Operation Cannot Be Completed Because Disk Is Full
In your Mac computer, you can work on various applications and manage your files. When you delete a file, it will be sent automatically to the Trash which is temporary storage for all the files that are deleted from your computer. You need to empty the Trash in order to free up some space in your drive. These files will be permanently deleted when you empty the Trash.
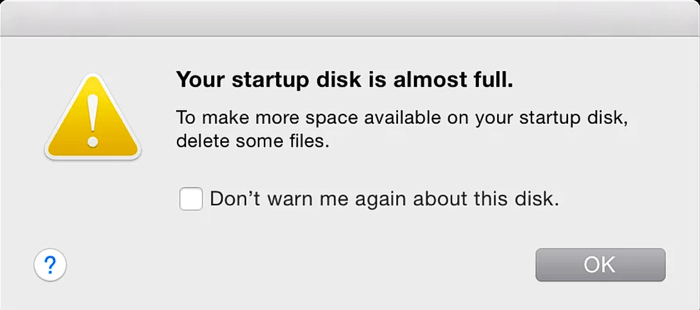
However, there are times that an issue occurs when you try to empty your Trash. It will throw out an error saying that the files are in use or you can't empty Trash because disk is full.
There are various methods discussed in this article that can help you fix the problem. A more reliable and convenient tool, FoneDog PowerMyMac can also aid you in deleting the files on your Mac computer and emptying the Trash successfully. Another article related to clearing disk space can also be seen as a guide to clearing disk space on MAC.
Before We Fix Issue on Can't Open Empty Trash Because Disk Is Full:
After several years of coding software for MacBook, we have created a professional tool that is easy to use.
Here is a tip for you: Download FoneDog PowerMyMac to Fix clean up your Mac and fix Mac can't empty trash because the disk is full issue. If you want to clean up your Mac all on your own, we have also collected some great solutions below.
PowerMyMac Scan your Mac quickly and clean junk files easily. Check the primary status of your Mac including the disk usage, CPU status, memory usage, etc. Speed up your Mac with simple clicks. Free Download 
Part 1. How to Empty Trash Using FoneDog PowerMyMacPart 2. Commons Reasons of Can't Empty Trash Because Disk Is Full Error Part 3. Fix Can't Empty Trash Because Disk Is Full By Closing AppsPart 4. Fix Can't Empty Trash Because Disk Is Full By Force EmptyPart 5. Fix Can't Empty Trash Because Disk Is Full By File UnlockPart 6. Fix Can't Empty Trash Because Disk Is Full By PC RebootPart 7. Fix Can't Empty Trash Because Disk Is Full via Terminal AppPart 8. Fix Can't Empty Trash Because Disk Is Full by Disabling SIPPart 9. Fix Can't Empty Trash Because Disk Is Full via Safe ModePart 10. Fix Can't Empty Trash Because Disk Is Full via Recovery Mode
Part 1. How to Empty Trash Using FoneDog PowerMyMac
FoneDog PowerMyMac is the best all-in-one Mac Cleaner tool that does the right job. It helps you clean up your Mac computer to free up more disk space and optimize the computer. The tool offers various features for your Mac computer such as cleaning up files, uninstalling applications, un-archiving files, protecting secret files, and monitoring the computer's performance by CPU utilization, memory usage, and hard disk space.
FoneDog PowerMyMac is a powerful tool that also allows the writing of files on Microsoft NTFS-formatted drives and helps you manage your apps easily. It can clean junk files, outdated backups, unneeded email attachments, empty Trash, and scans and removes duplicate files and thereby saving space on your hard drives. A free trial is available for download for your Mac computer.
PowerMyMac Scan your Mac quickly and clean junk files easily. Check the primary status of your Mac including the disk usage, CPU status, memory usage, etc. Speed up your Mac with simple clicks. Free Download
Step 1. Launch the FoneDog PowerMyMac Tool
Download the FoneDog PowerMyMac application from its website and install the program on your Mac computer. Next, launch the tool to start the cleanup. The status of your computer is first displayed on the screen with the percentage details of the CPU, memory, and disk.
Step 2. Select the Cleaning Option
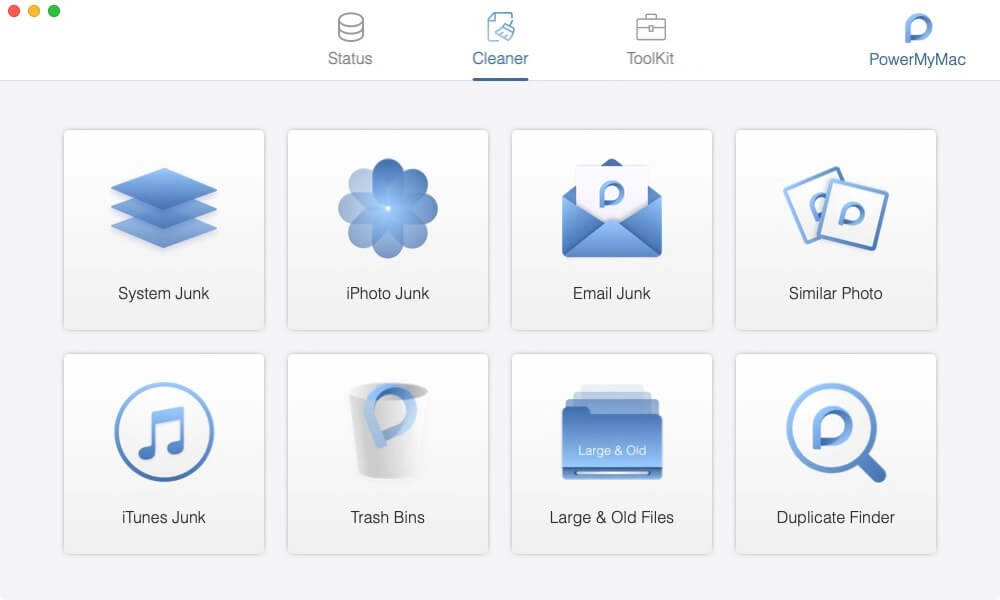
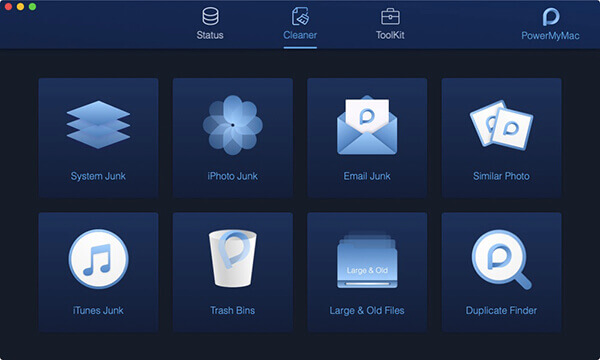
Next step is to select the Cleaner tab on the top menu. The list of cleaning options is displayed on the screen. Select Trash Bins to empty the Trash in your Mac computer. The tool is also capable of cleaning up the system junk, iTunes, email, and iPhoto junks, large and old files, similar photos and finding duplicate files.
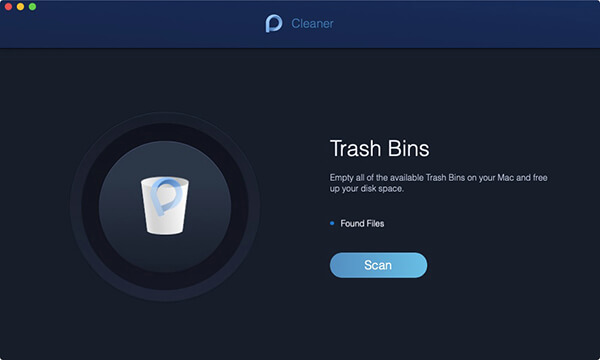
Step 3. Scan Your Mac Computer
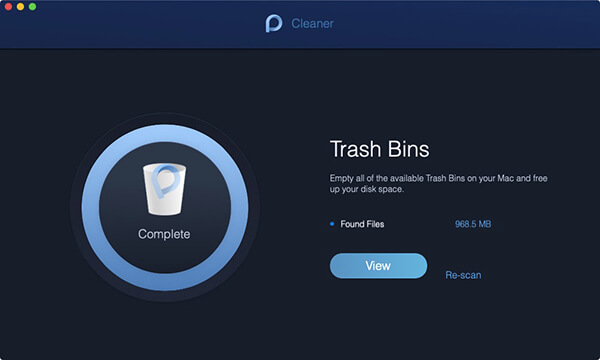
Click on the Scan button to start analyzing the files in the Trash on your Mac computer. When the scan is complete, it will return the space occupied by the files in the Trash. You can click the View button to view the files or click Re-scan to scan again the Trash bin.
Step 4. Clean the Trash
When you view the files scanned in the Trash, the files are listed with their corresponding occupied space. Select the files that you want to permanently delete from your computer and click the Clean button. It will delete all the files stored in the Trash and free up the disk space. Wait until the cleaning process is finished.
Part 2. Commons Reasons of Can't Empty Trash Because Disk Is Full Error
Sometimes you will encounter an issue in Mac that you can't empty the Trash because disk is full. The problem may be due to various reasons such as the files are in used by some apps or processes. You will receive a message saying that the operation cannot be completed because the item is in use. Another reason is when the file is in a locked state. The file may also be corrupted and your disk needs a repair or it may be due to System Integrity Protection (SIP) that is enabled to protect your data in Mac.
Part 3. Fix Can't Empty Trash Because Disk Is Full By Closing Apps
This section provides a basic process to teach you how to fix the issue of can't empty Trash because disk is full in Mac. You may not be able to empty the Trash because the files are locked or in use. You will see a notification that pops up on the screen saying that the operation cannot be completed because the item is in use. Try to close and quit all the applications.
Step 01: On your Mac computer, close and quit all applications that are opened.
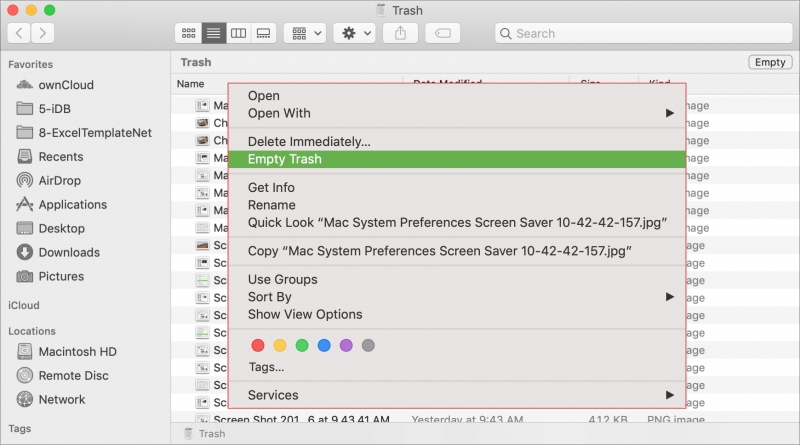
Step 02: Open the Trash.
Step 03: On the top right corner of the window, click the Empty button.
Part 4. Fix Can't Empty Trash Because Disk Is Full By Force Empty
This simple method provides the steps to guide you on how to fix the issue of can't empty Trash because disk is full in Mac. If a message will prompt that the files are locked or in use, you can try to force empty the Trash by pressing a key and bypass the files that are locked or in use.
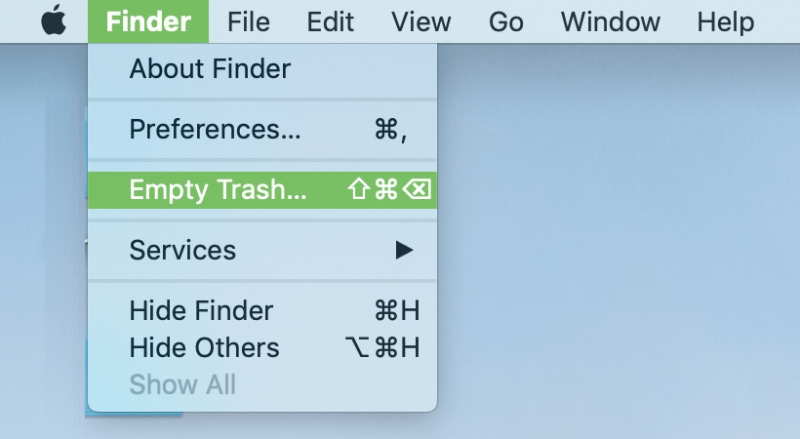
Step 01: On your Mac computer, press and hold the Option key.
Step 02: Navigate to Finder.
Step 03: Select Empty Trash.
Or select the files in the Trash, then press and hold the Option key while you click the Empty button.
Part 5. Fix Can't Empty Trash Because Disk Is Full By File Unlock
This basic method provides the steps to guide you on how to fix the issue of can't empty Trash because disk is full in Mac. You can unlock the file in the Trash.
Step 01: Open the Trash.
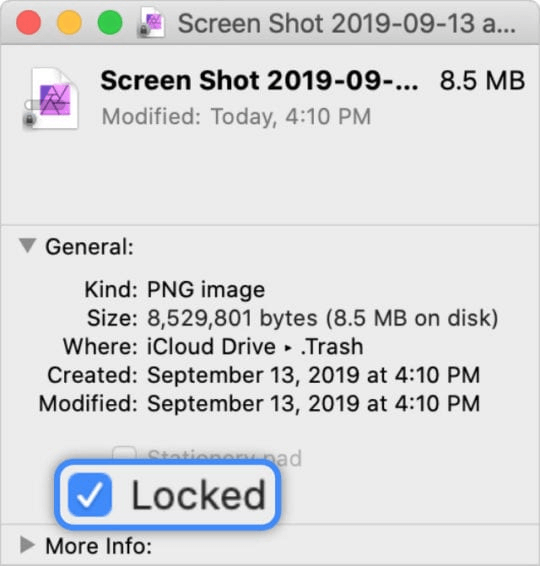
Step 02: Right-click on the file that you wish to delete.
Step 03: Select Get Info.
Step 04: Uncheck the Locked checkbox.
Step 05: Right-click on the file again and click Delete immediately.
You can also try to rename the file and delete it.
Part 6. Fix Can't Empty Trash Because Disk Is Full By PC Reboot
This simple method provides the steps to help you on how to fix the issue on can't empty Trash because disk is full in Mac by rebooting your computer which fixes most issues.
Step 01: Restart your Mac computer to stop all background processes that may be using the files.
Step 02: Open the Trash.
Step 03: On the top right corner of the window, click the Empty button.
Part 7. Fix Can't Empty Trash Because Disk Is Full via Terminal App
This section provides the steps to guide you on how to fix the issue of can't empty Trash because disk is full in Mac by entering a command in the Terminal window.
Step 01: On your Mac computer, launch the Terminal app.
Step 02: On the Terminal window, type in the command: Sudo rm –R followed by a space at the end. Note: Make sure that there is a space on the last part of the command and DO NOT press the Return key. Also, DO NOT close the Terminal window.
Step 03: Open the Trash.
Step 03: Select all the files and folders that you want to delete.
Step 04: Drag and drop the selected files into the Terminal window. The paths of the files and folders are added to the remove command in the Terminal window.
Step 05: Press the Return key.
Step 06: Enter the Administrator password when prompted. Wait until the file deletion process is completed.
Part 8. Fix Can't Empty Trash Because Disk Is Full by Disabling SIP
This section provides the steps to guide you on how to fix the issue of can't empty Trash because disk is full in Mac by disabling the System Integrity Protection (SIP). By default, your files in Mac are protected through SIP security protocol from malicious threats that pose harm to your data.
Disable System Integrity Protection (SIP) temporarily:
Step 01: Start or restart your Mac computer.
Step 02: When your Mac computer is starting to boot, press and hold the Command
+ R keys to enter the recovery mode.
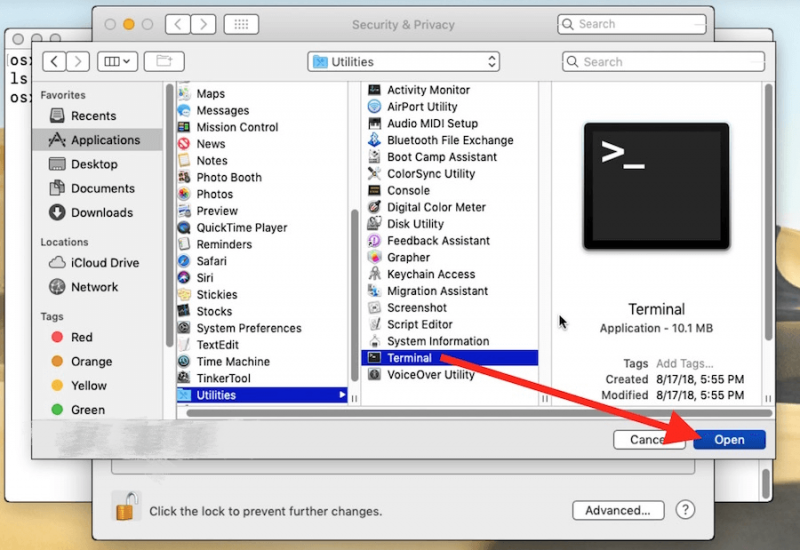
Step 03: At the top of the screen, click on Utilities.
Step 04: Select Terminal.
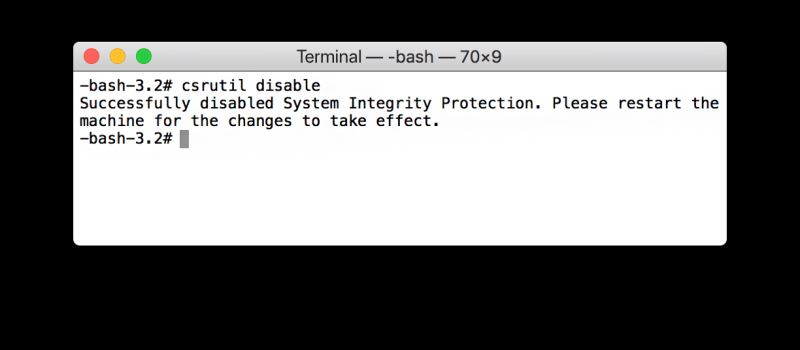
Step 05: On the Terminal window, to verify the status of SIP, enter csrutil status and press the Return key.
Step 06: To disable SIP, enter csrutil disable; reboot and press the Return key.
Step 07: The Mac computer will reboot automatically.
Step 08: Open the Trash.
Step 09: On the top right corner of the window, click the Empty button.
Step 10: Enable System Integrity Protection (SIP). Start or restart your Mac computer.
Step 11: When your Mac computer is starting to boot, press and hold the Command
+ R keys to enter the recovery mode.
Step 12: At the top of the screen, click on Utilities.
Step 13: Select Terminal.
Step 14: On the Terminal window, to verify the status of SIP, enter csrutil status and press the Return key.
Step 15: To disable SIP, enter csrutil enable; reboot, and press the Return key.
Step 16: The Mac computer will reboot automatically.
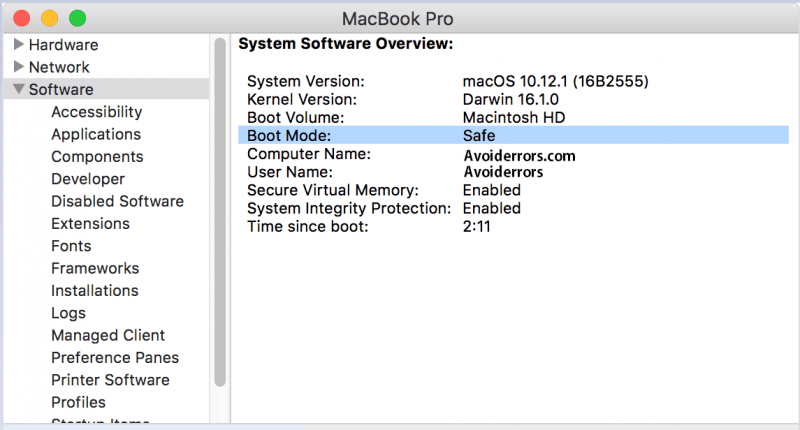
Part 9. Fix Can't Empty Trash Because Disk Is Full via Safe Mode
This section provides the detailed steps to help you on how to fix the issue of can't empty Trash because disk is full in Mac by starting it in safe mode. This will isolate the problem and in order to stop a startup or login item from using the files. Safe mode will avoid loading or opening programs automatically and will also delete cache files.
Step 01: Start or restart your Mac computer.
Step 02: When your Mac computer is starting to boot, press and hold the Shift key.
Step 03: The Apple logo will appear on your screen. Release the Shift key when the login window is displayed.
Step 04: Your computer should be in Safe mode. Now, open the Trash.
Step 05: On the top right corner of the window, click the Empty button.
Step 06: Restart again your Mac computer booting it normally without pressing any keys.
Part 10. Fix Can't Empty Trash Because Disk Is Full via Recovery Mode
This section provides the detailed steps to help you on how to fix the issue of can't empty Trash because disk is full in Mac by starting it in recovery mode. The macOS Recovery tool contains the various utility programs in Mac that can help you repair or erase a disk, restore file backups from Time Machine, reinstall Mac OS, and many others. Try to start your computer from the macOS recovery tool.
Step 01: Start or restart your Mac computer.
Step 02: When your Mac computer is starting to boot, press and hold the Command
+ R keys to enter the recovery mode.
Step 03: Release the keys when the Apple logo or startup screen is displayed. Enter an Administrator password when prompted.
Step 04: The macOS utility window will appear. Select Disk Utility from the list of macOS utilities.
Step 05: Click on Continue.
Step 06: On the Disk Utility window, choose the disk that stores the file that you wish to delete.
Step 07: Select the First Aid option from the Disk Utility tool. This will repair the chosen storage disk.
Step 08: Select Run.
Step 09: Close the Disk Utility tool.
Step 10: Reboot your Mac computer.
Step 11: Open the Trash.
Step 12: On the top right corner of the window, click the Empty button.
People Also ReadHow To Allow Pop Ups On MacEasy Steps! Uninstall Anaconda on Mac Effectively!
You may experience an error when you want to delete the files and empty the Trash in your Mac computer. There are several causes to this such as a file being used, locked, or corrupted and your disk needs to be repaired. Also, with SIP as enabled in Mac, it can possibly disallow deletion of your files.
With this, you can try the different methods tackled in this article to fix the issue of can't empty Trash because disk is full. You can also utilize a safe and reliable tool called FoneDog PowerMyMac which can aid you in deleting what you don't need and emptying the Trash easily without going through all the hassles. Speaking of deletion, I'd like to recommend an article about delete mail app on Mac.
Operation Cannot Be Completed Because Disk Is Full
Source: https://www.fonedog.com/powermymac/cant-empty-trash-because-disk-is-full.html
0 Response to "Operation Cannot Be Completed Because Disk Is Full"
Post a Comment